This rig is based around a hard disk recorder like the Alesis HD24 (pictured). With this setup, you have the stereo playback resolution and output options of a computer/high track count audio interface, but without some of the hassles that come with laptop based systems. However, you have the added step of importing your audio files from your computer into the HD recorder. You will also need to set up markers in order to indicate the start points of each song. Although editing and even changing setlist order can be a little cumbersome, the reliability and roadworthyness of a rackmount hardware unit can offer valuable piece-of-mind.
I suggest looking for a used hard disk recorder. Why used? This is 1990’s technology. If you can find one of these new, it will cost over $1,000 and you’re better off with one of the other options at that price point in my opinion.
If you’re new to this world of backing tracks, you can check out this article for a quick overview: Backing Tracks Rigs – An Introduction
Playback: Up to 23 channels (plus click) 24bit 48 kHZ
Audio Fidelity: *****
Ease of Setup: **
Portability: **
Reliability: *****
Ease of Editing: *
Ingredients
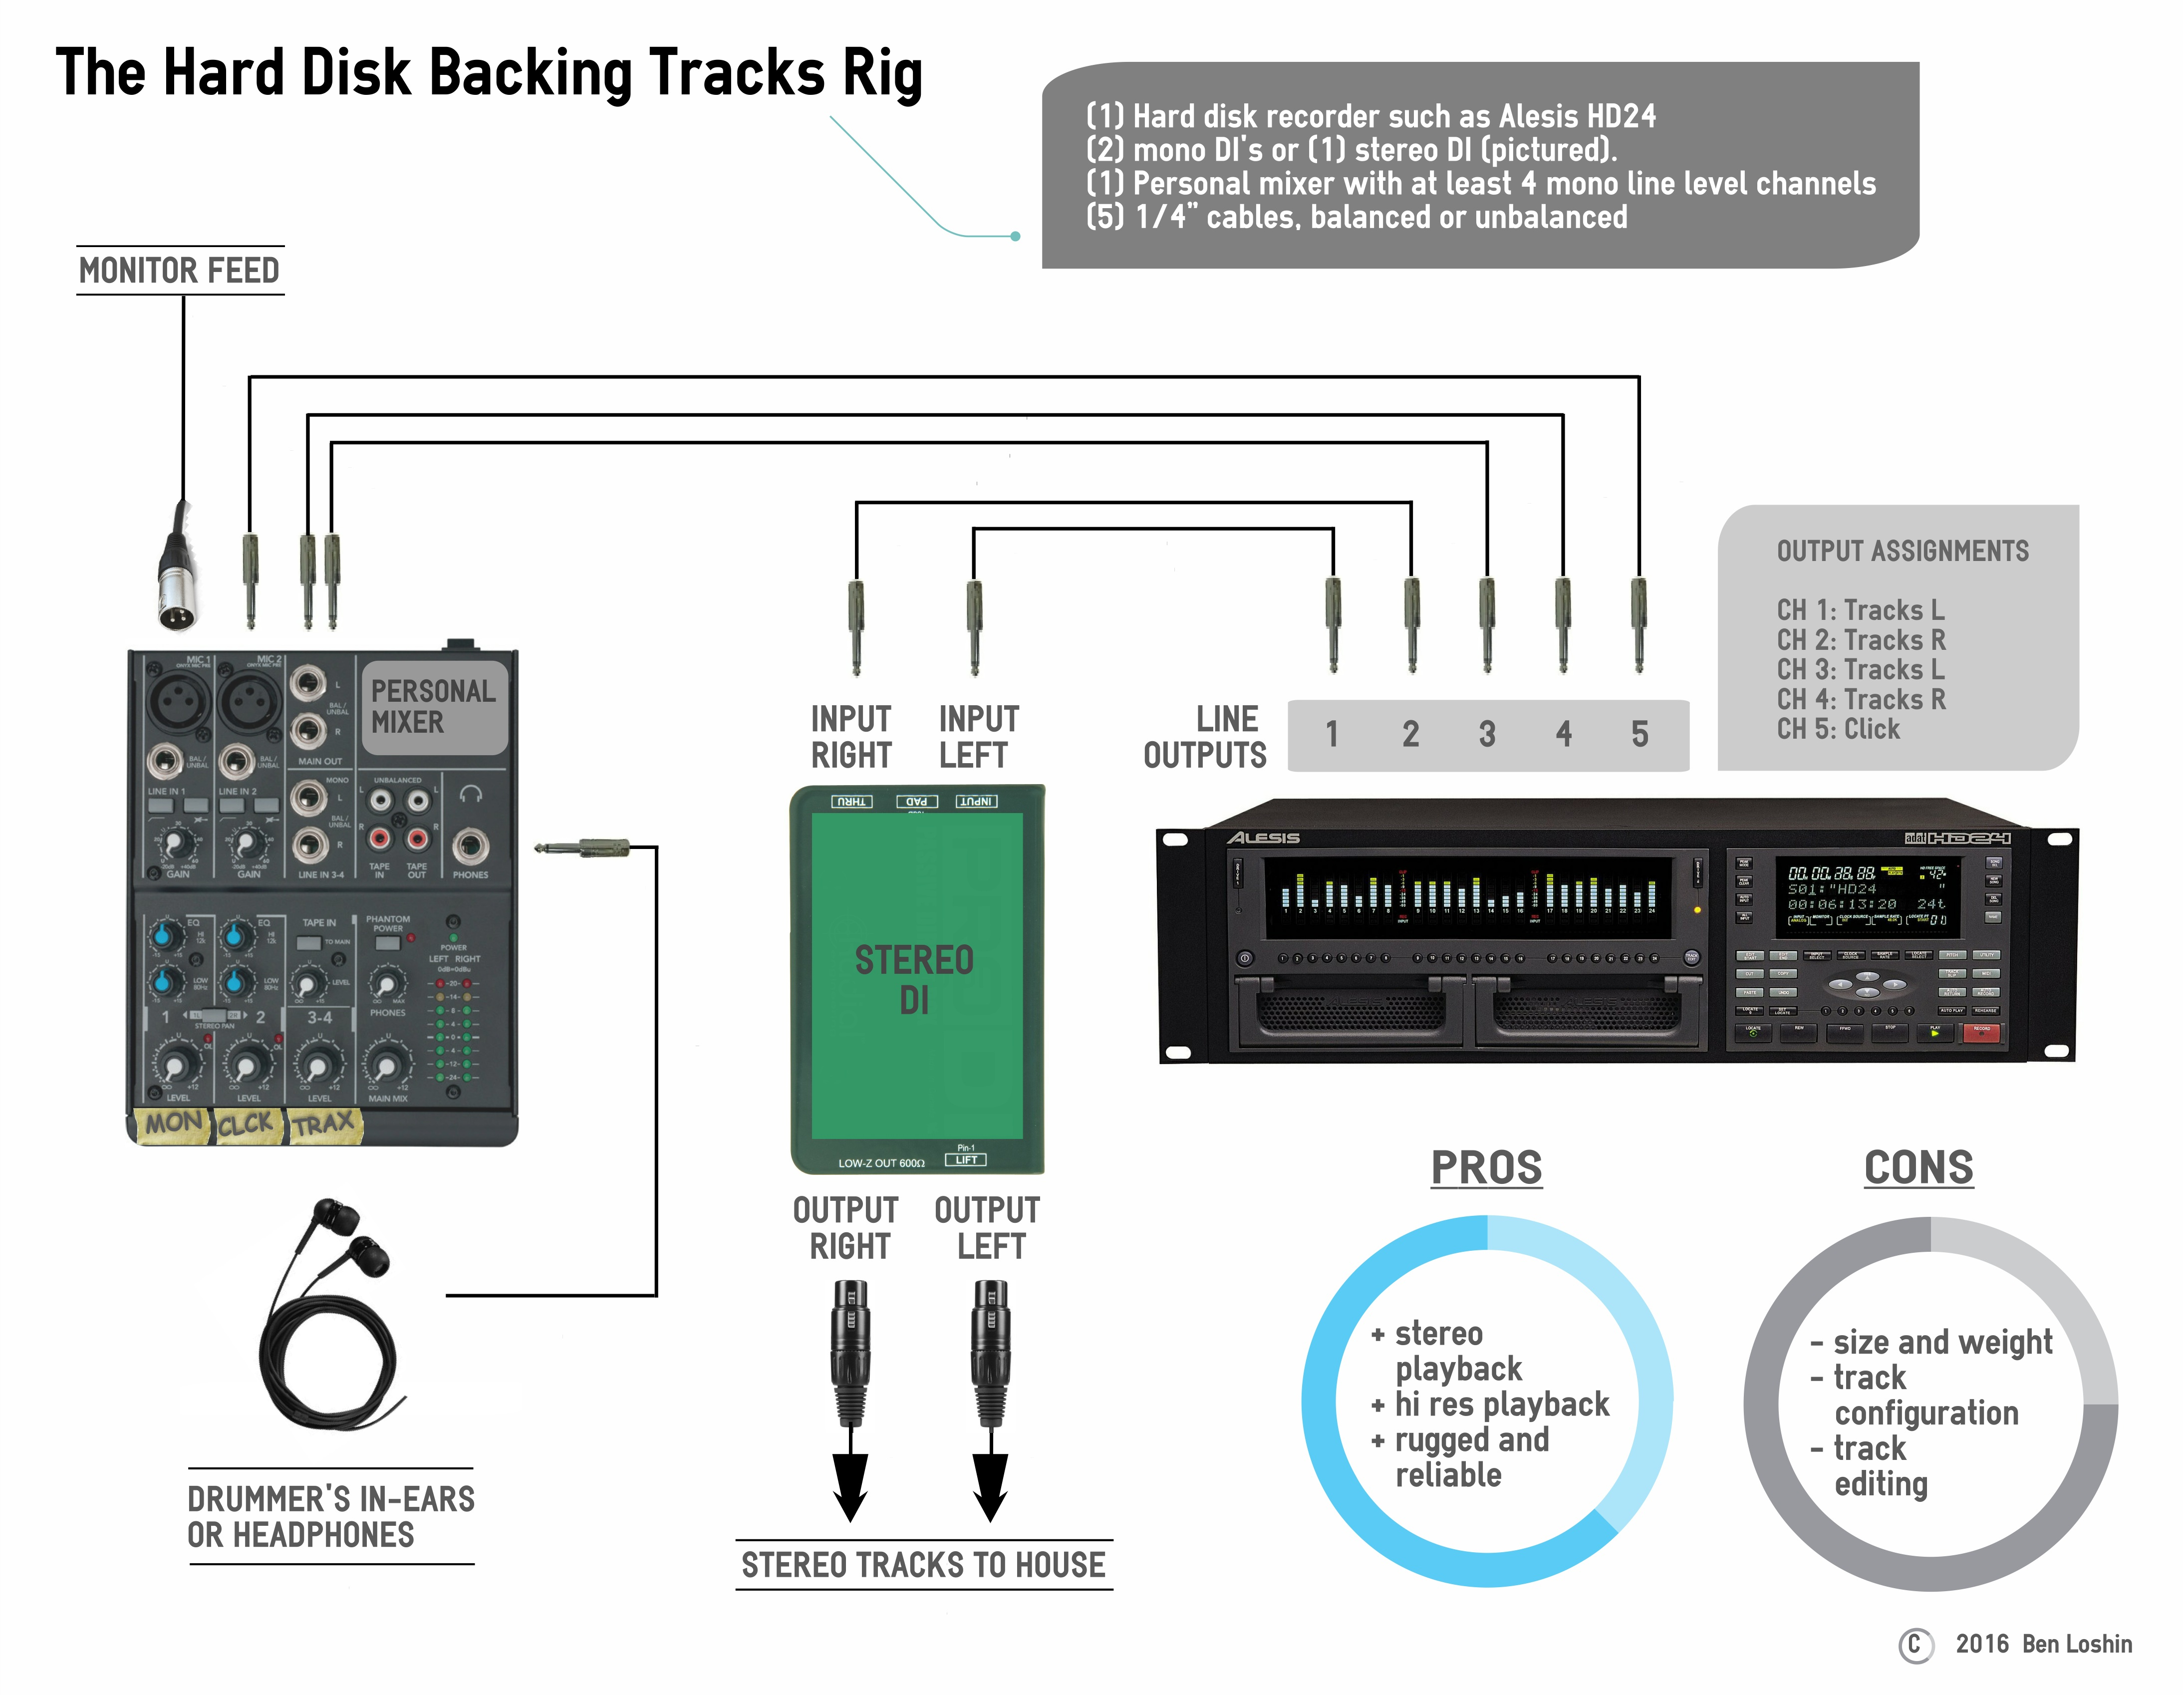
- (1) Hard disk recorder such as Alesis HD24 (pictured).
- (2) DI boxes or (1) stereo DI (your own). Label them “Left” and “Right”
- (1) Personal mixer with at least 4 mono line level channels
- (5) ¼” cables, balanced or unbalanced
- (1) Headphone extender
Prep
- Prepare your backing tracks in your DAW so that you have a stereo mix and a click track.
- Import your tracks into the HD24 such that the first two output channels are your stereo backing track, left and right respectively, the third and fourth channels are duplicate outputs of your stereo backing track, and the fifth channel is your click/cue track. You can use the additional output channels if you are sending multiple stems to the house.
- Run a ¼” balanced or unbalanced cable from Output Channel 1 to the input jack on the DI box labeled “Left”
- Run a ¼” balanced or unbalanced cable from Output Channel 2 to the input jack on the DI box labeled “Right”
- Run a ¼” balanced or unbalanced cable from Output Channel 3 to a channel on your mixer labeled “Tracks L”
- Run a ¼” balanced or unbalanced cable from Output Channel 4 to a channel on your mixer labeled “Tracks R”
- Run the ¼” balanced or unbalanced cable from Output Channel 5 to a channel on your mixer labeled “Click”.
- Introduce yourself to the sound guy/gal or monitor engineer and politely ask for a feed to plug into the channel on your mixer labeled “Mon”. Make him/her aware of your DI’s for stereo front-of-house playback.
- Connect your in-ear monitors or headphones to the headphone jack on your mixer.
Tips
- The high output track count on the HD24 and units like it make it possible to create an extra left and right output for your backing tracks that you can use to send to yourself for independent control of the track level in your own in-ears. This will allow you to ride the level of the tracks in your mix without affecting the level going to the house.
- If anyone else in the band needs to hear click/cues, you can use one of the available outputs to duplicate that track and send it to that player or to the monitor engineer.
- The HD24 is a 3-space rackmountable unit. You can house it in a soft rack case such as the Gator GRB 4U, with the mixer and DI’s on top. To decrease setup time, bundle the three cables that connect the HD24 to your mixer using cable ties, and bundle the two cables that connect the HD24 to your DI’s. Label the ends of each cable.
- To be extra slick, you can get a rackmountable mixer, a rackmountable DI, and a rackmountable power supply, and house everything in one rack. This option could work for van and bus tours and church installations, but will likely be too big and heavy to fly.