This is probably the simplest way to run backing tracks at any gig with a minimal amount of equipment. Although an iPhone is pictured, you can use any device capable of playing any digital stereo music file. I’ve used this setup everywhere, from small clubs, to live performances on national TV. Although it’s not ideal for bigger venues with stereo PA systems, it works great in a pinch when you have to deal with budget, setup time, or equipment size limitations.
If you’re new to this world of backing tracks, you can check out this article for a quick overview: Backing Tracks Rigs – An Introduction
Playback: Mono, limited by device’s built-in digital-to-analog converter
Audio Fidelity: depends on the file type (mp3, wav, AIFF, etc.)
Ease of Setup: *****
Portability: *****
Reliability: ***
Ease of Editing: *
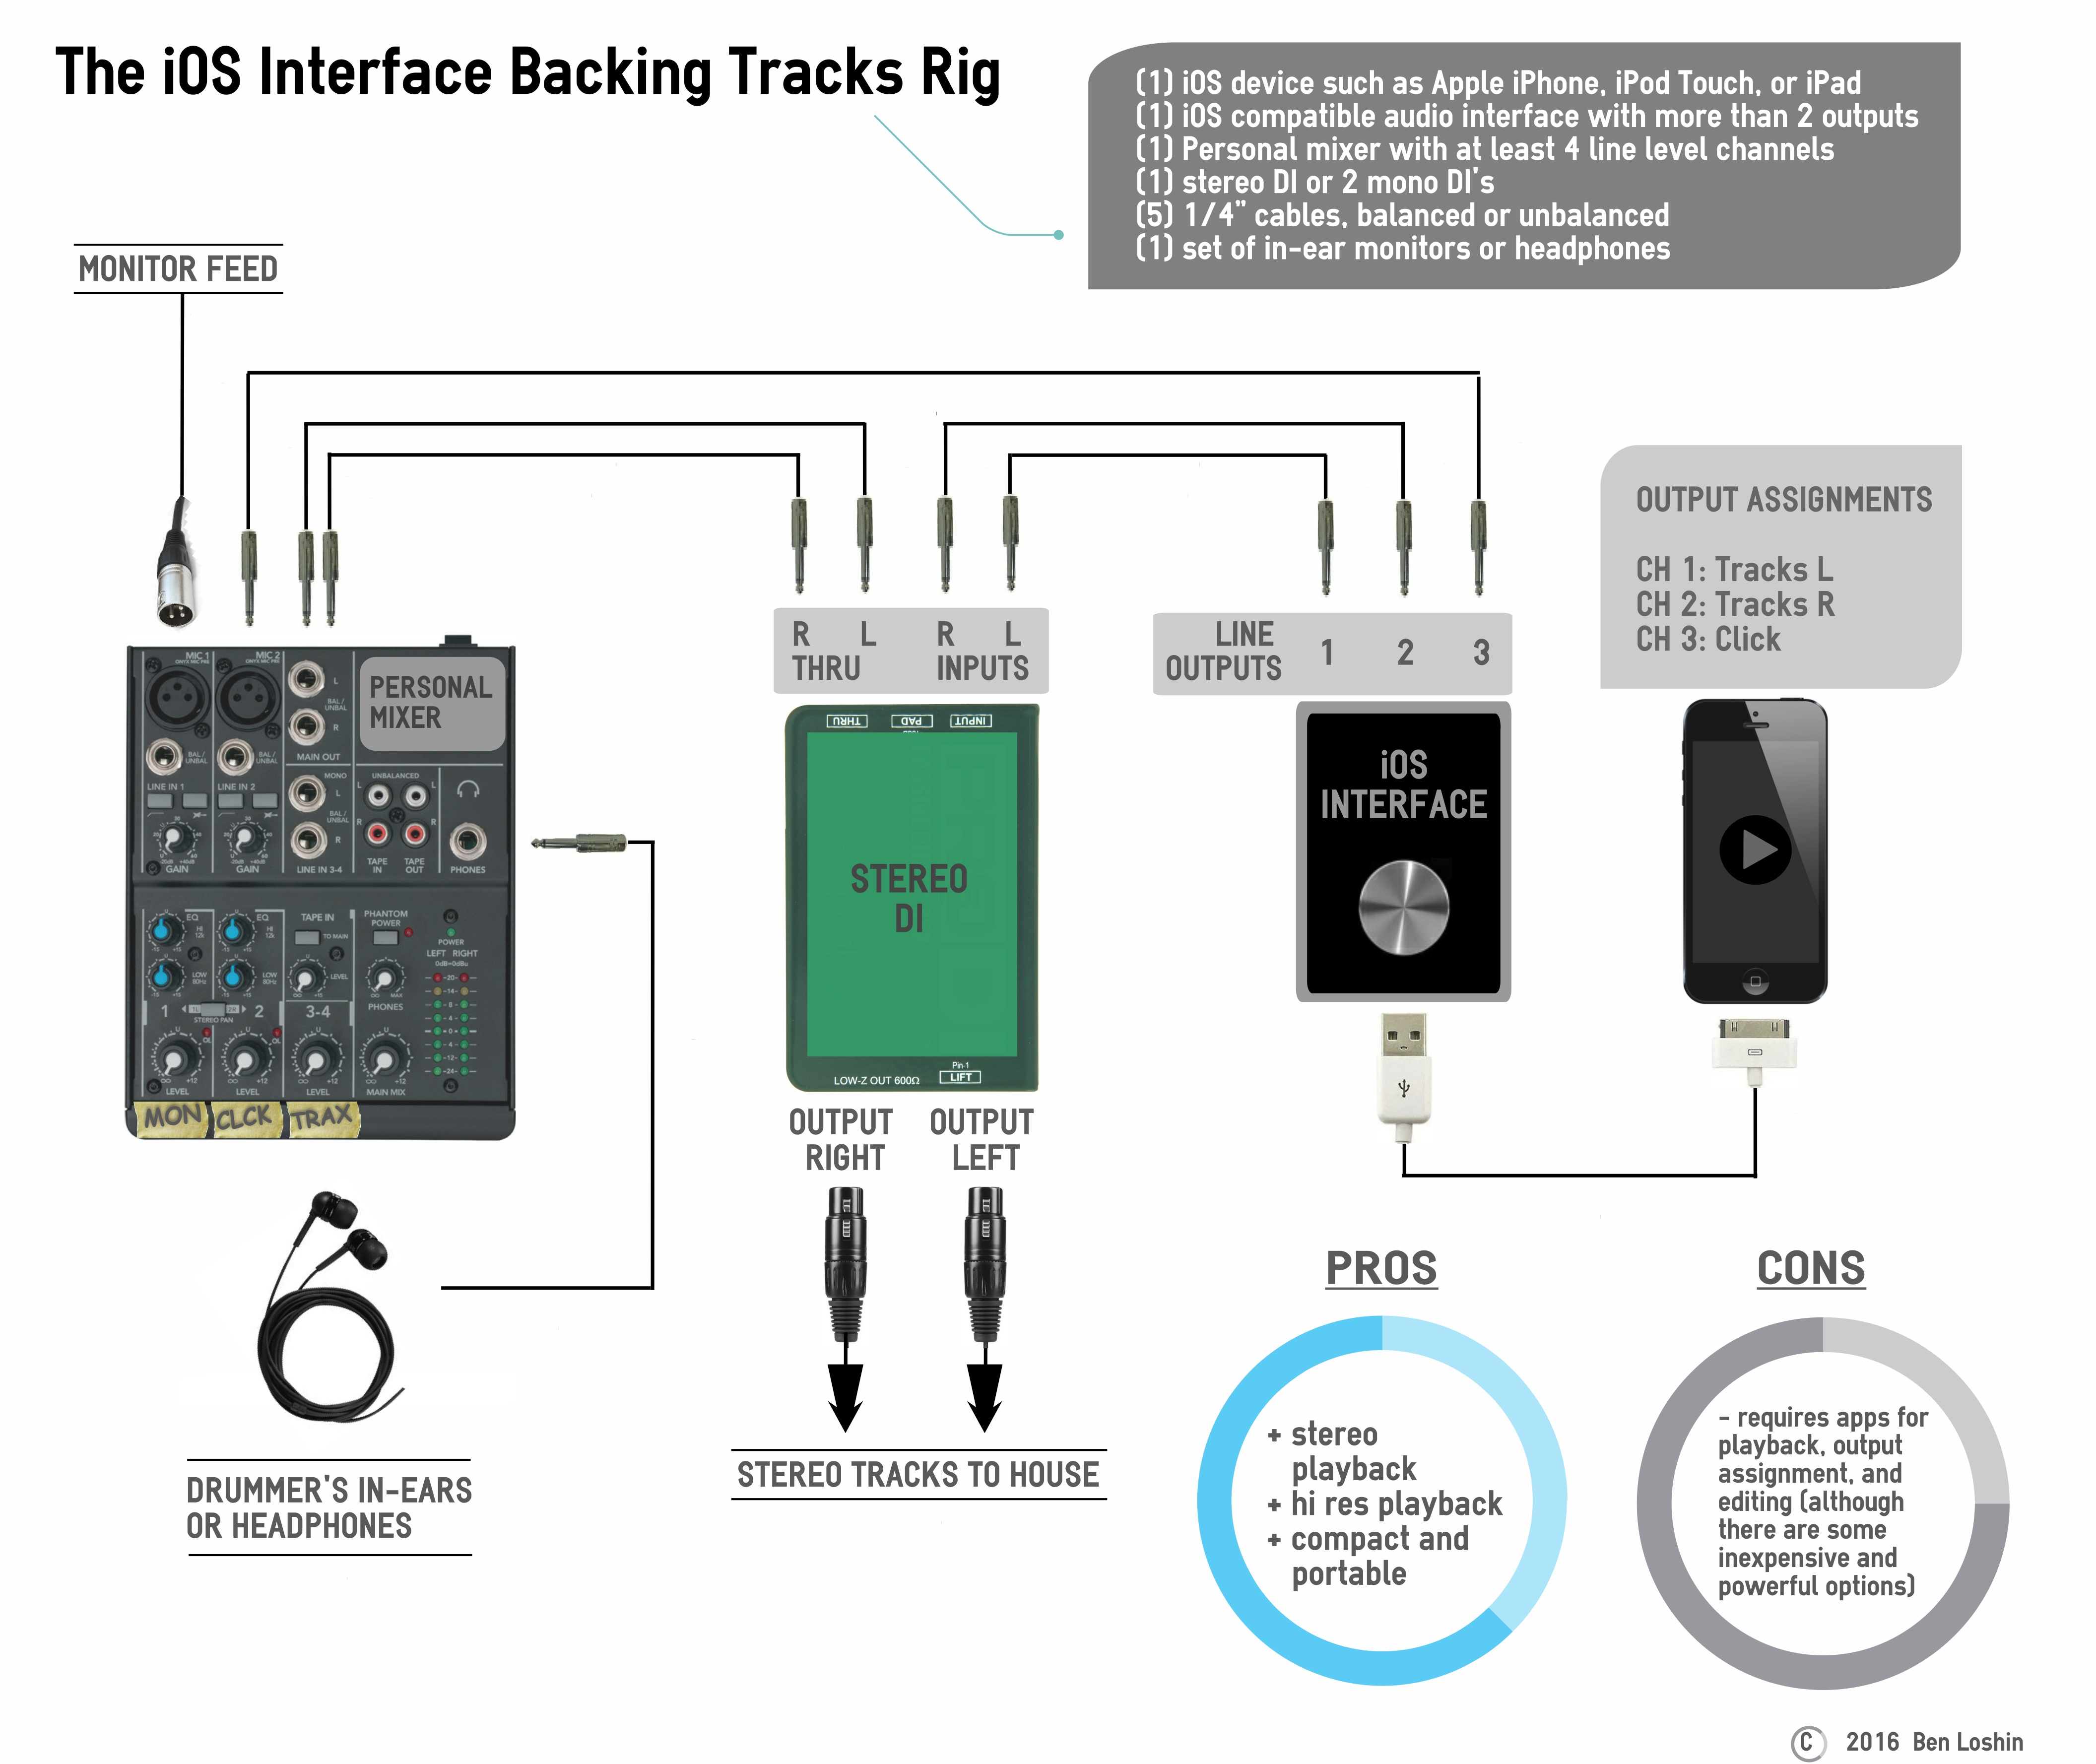
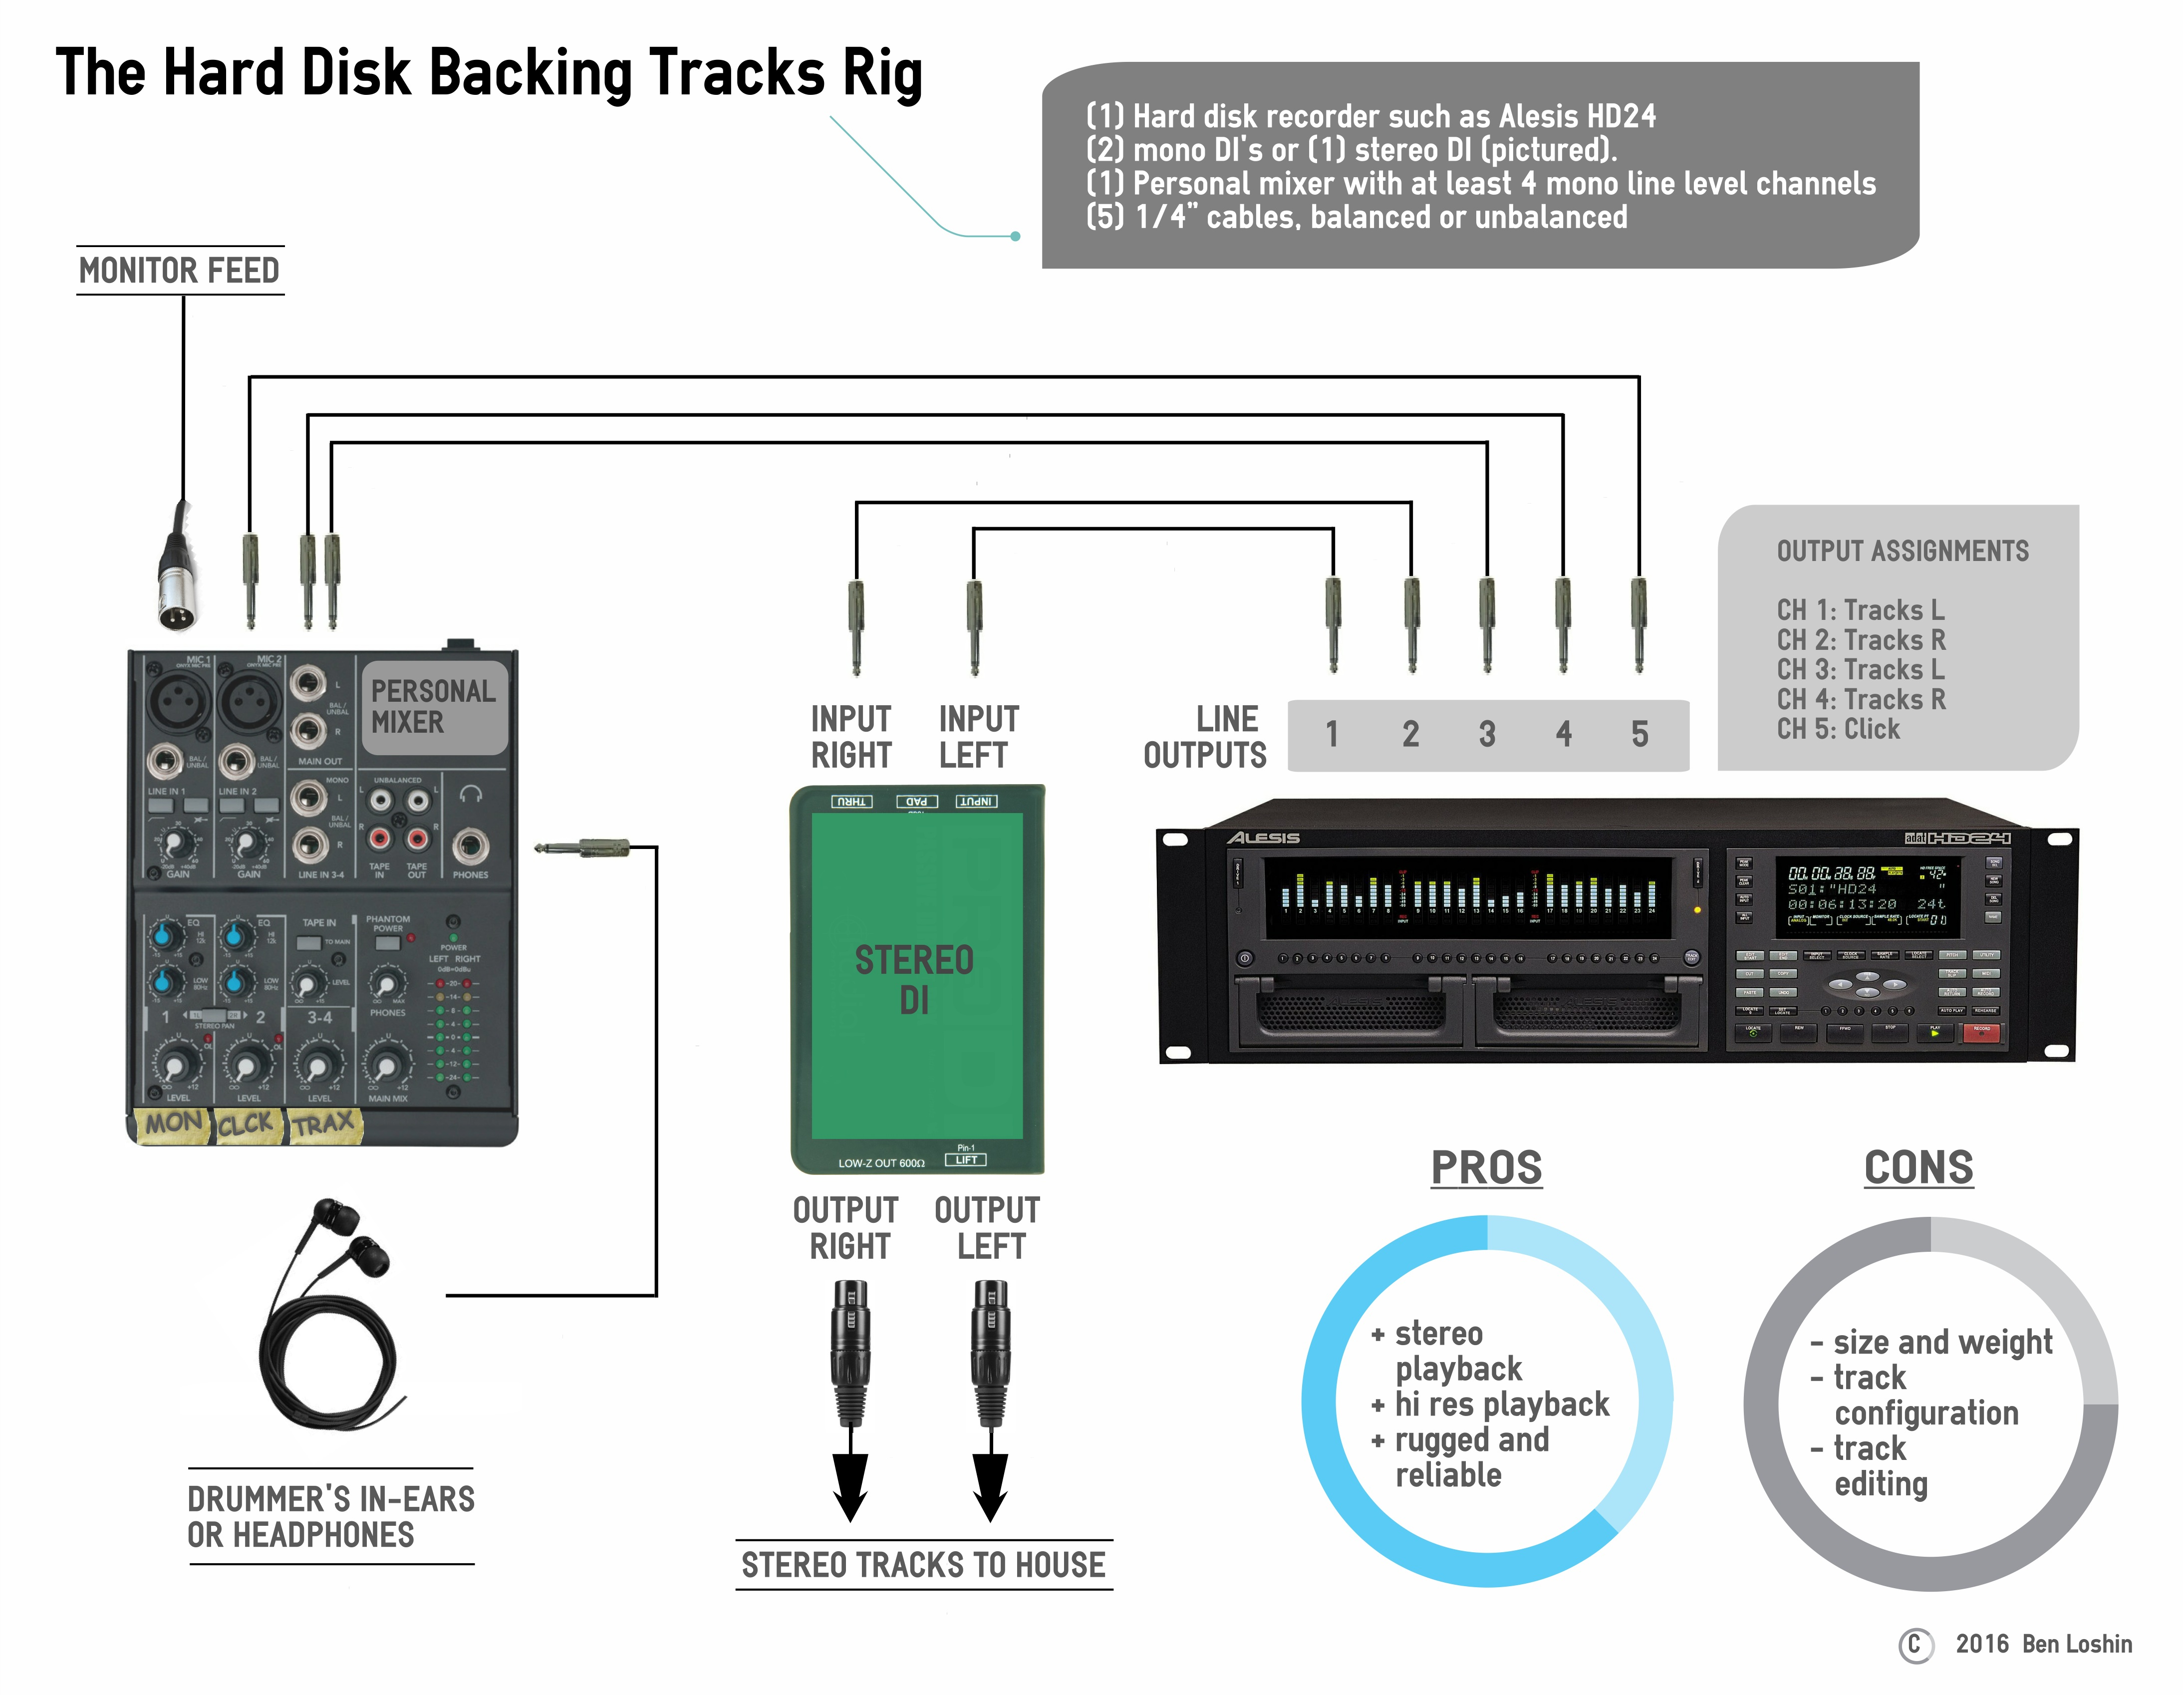
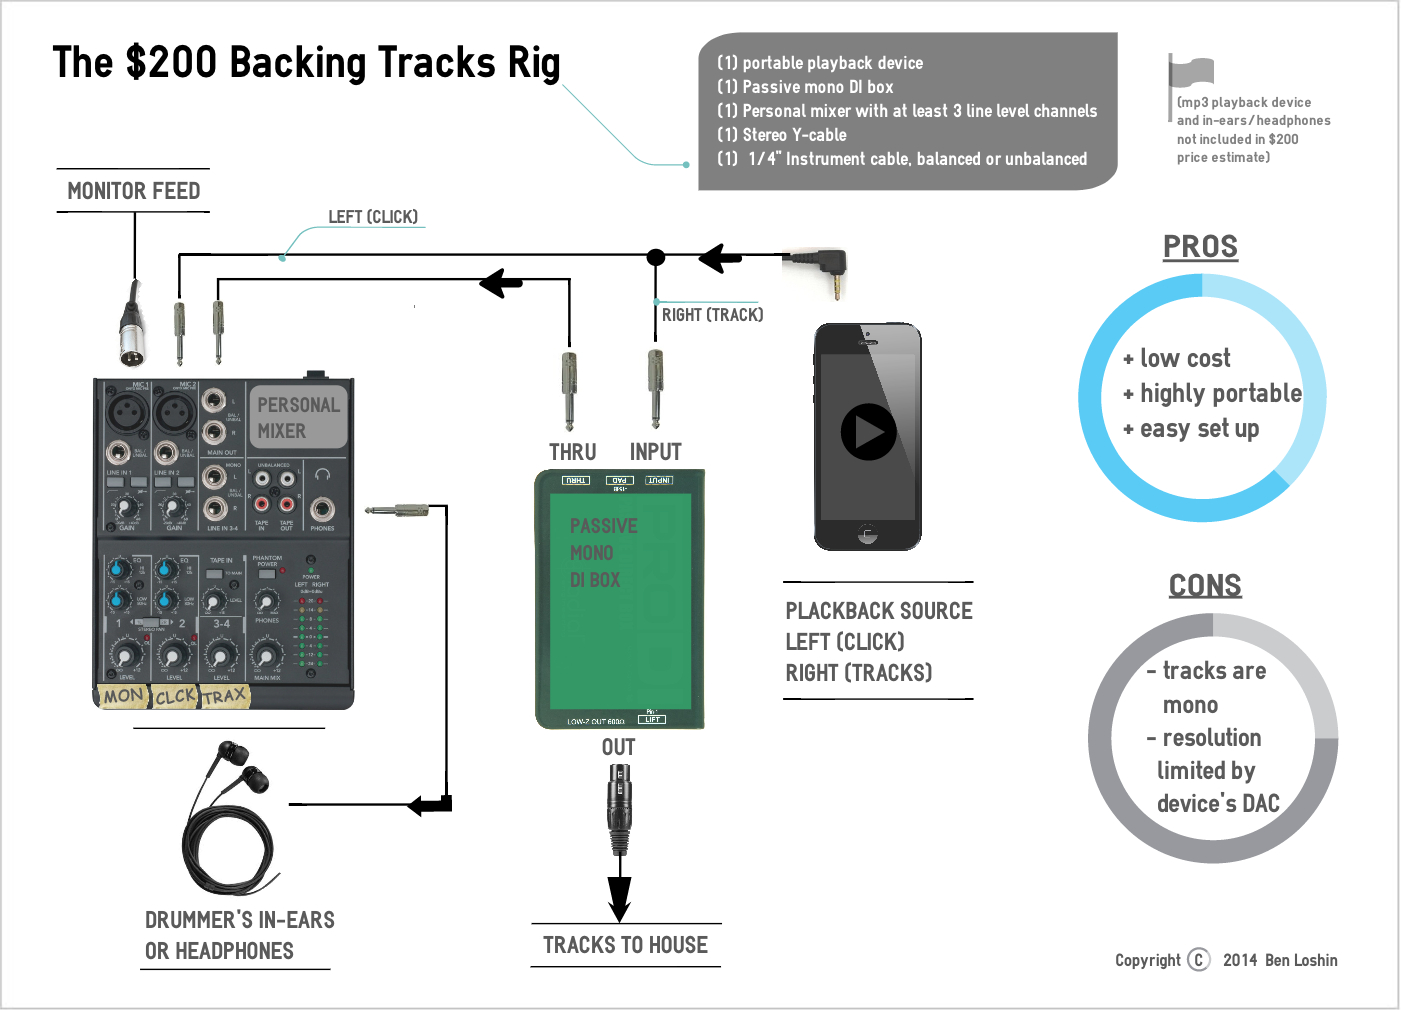
Equipment
- (1) iOS or other device with a headphone jack capable of stereo audio playback (not included in price estimate)
- (1) DI box
- (1) Personal mixer with at least 3 mono line level channels
- (1) Stereo Y-cable or splitter cable
- (1) ¼” cable, balanced or unbalanced
- (1) Headphone extender (optional)
Configuration
- Prepare your backing tracks so that the Left side of the stereo mix is just click track/cues and the Right side is just backing track. In other words, when you bounce down your backing track to mp3, put everything you don’t want the audience to hear on the Left side and everything you do want the audience to hear on the Right side.
- Plug Y-cable into 1/8” headphone jack on your iPhone, iPod, iPad, or other device capable of mp3 playback.
- Plug the (Right) ¼” end of Y-cable into DI box input jack.
- Plug the (Left) ¼” end of Y-cable into a channel on your mixer. Label this channel “Click” on your mixer
- Run the ¼” balanced or unbalanced cable from the “thru port” on your DI box to a second channel on your mixer. Label this channel “Trax” on your mixer.
- Introduce yourself to the sound guy/gal or monitor engineer and politely ask for a feed to plug into a third channel on your mixer labeled “Mon”. Make him/her aware of your mono DI for Front of House playback.
- Connect your in-ear monitors or headphones to the headphone jack on your mixer using the optional headphone extender.
Tips
- If you’re using a smart phone for playback, unless you want the crowd to hear that phone call from your mom, make sure you turn off the “phone” functions during your performance. On an iPhone this is accomplished by putting your phone in Airplane Mode.
- If you’re using an iOS device, your iTunes app will automatically advance to the next song in your playlist. I recommend using a backing tracks app such as BackTraxTM by Aisle Pro Software or LiveTrax ProTM by Monakrome. These apps will stop playback at the end of each track and automatically cue up the next track. They also include very large buttons for playing, stopping, and advancing through your setlist.
- Leave your device plugged into a power supply so you don’t have to rely on your device’s battery life.